
Spider plants thrive in narrow spaces. In fact, small containers can push them to produce new branches, something they may not do if planted in overly large areas.
That said, there comes a time when it’s necessary to repot spider plants, such as when they’ve outgrown their containers, leading to yellow foliage and bounded roots.
In such cases, learn the when & how of repotting spider plants here, so you can give them proper care.
Table of Contents
When to Repot Spider Plants
1. When the plant has become root-bound
Spider plants need space to spread their roots. If the container is too small, they risk becoming root-bound, a state that can result in dehydration; excessively fast water loss in the soil; yellow, brown, and droopy leaves; or inhibited growth due to lack of nutrients.
Hence, it’s important that you take note of these root bound spider plant symptoms and move it to bigger containers when necessary.
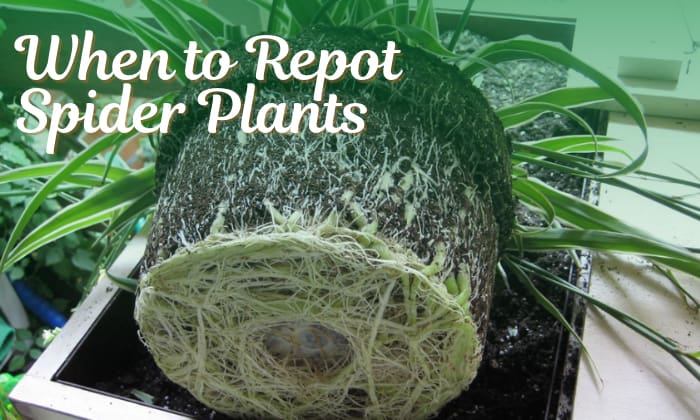
At the same time, an easy way to time your repotting is to check the plant’s base. If you see rhizome mats at the bottom, you have a spider plant root bound that needs more space to grow.
Better yet, before there are even mats, see if the roots are forming a circle at the bottom or poking through the drain holes in your containers. Either sign means repotting is necessary.
2. When you see roots above the topsoil & cracks in the planter
Aside from roots growing out of pot bases, you may see rhizomes poking through the top of the soil as well.
This indicates that your Chlorophytum is searching for space to expand, since it has nowhere else to go.
In addition, the plant may become so big that it puts pressure on the container and cracks it.
In either case, repotting root bound spider plant will solve the issue.
3. When you have a low-quality soil mix
It’s possible that your spider plant roots have not outgrown their containers yet. Instead, it’s the soil that’s causing problems, such as root rot, discolored leaves, or loss of foliage.
If your soil is suitable for spider plants, it should have the following features:
- A pH of 6 to 7.2 with adequate drainage
- A commercial potting mix that’s low in fluoride
- Peat moss, pine bark fines, perlite, and compost if using a DIY mix instead of a commercial one. Charcoal or pumice instead of peat moss is also fine.
- A fresh, earthy smell without weird odors
Note that while changing your spider plant soil, it’s best to pick the appropriate pots as well, such as those made of terracotta, ceramic, or plastic. Clay pots are a no-go, given their poor water retention.
4. When the plant is diseased
Spider plant repotting is necessary when there is disease or pests – at least if you want to save your spider ivy. Root rot, for instance, can cause thin, discolored foliage, wilting, and even plant death.
The primary way to address this problem is to change the soil and gardening container entirely. After all, fungi and other pests may be present in the pot holding the sick plant.
In practice, it’s best to trim off all diseased and dead parts (be they roots or leaves). Then, cut off about ½ inch of the healthy roots before you replant a spider plant.
How to Repot Spider Plants

Follow the steps below, whether you’re repotting overgrown spider plant or one that’s diseased.
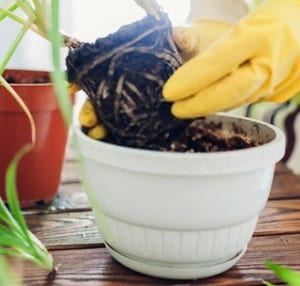
- First, flip the container and gently pull the plant out. Note that you should water spider plants prior to moving them, as drought can lead to transplant shock.
- Afterward, check the plant and soil for disease and other problems. For instance, root rot will manifest as dark, mushy rhizomes and fragile stems, while white buildups on soil can indicate salt accumulation or fungi. Manually remove the diseased parts or buildups before proceeding.
- At this point, you should have new pots for spider plants Choose one of the materials we mentioned above, and make sure the new container is 1 to 2 inches bigger than the old one. Drainage holes are essential as well.
- Fill two inches of the transplant pot with soil. You can use your old soil if it meets the criteria described above. Otherwise, I recommend choosing Miracle-Gro’s Houseplant Potting Mix to make things easy. You can also combine pine bark fines, perlite, compost, and peat moss in a 1:1:1:3 ratio.
- Next, plant spider plant tubers in the soil and backfill the roots with the rest of the potting mix. Remember to leave one inch of the container empty.
- Water immediately if the soil is dry.
How to Care for Spider Plants After Repotting
The next thing to do after you transplant spider plant is to care for it. It’s essential that you help your ornamental adapt to its new environment.
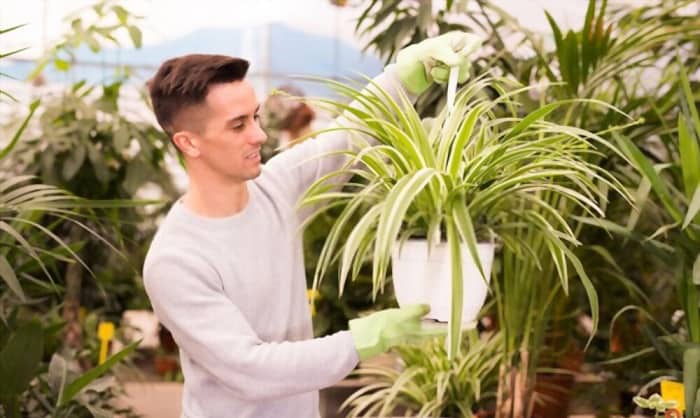
- To begin with, put the pot under indirect sunlight to avoid brown and scorched leaves. Aim for six to eight hours of UV exposure for optimal growth, and four to six hours only if you use artificial bulbs.
- Irrigate the soil once a week to minimize the risk of spider plant transplant shock. Water the soil until you can see liquid dripping from the bottom holes. Moreover, check the soil before watering.
The top one inch should be dry if the container is below six inches in width, but aim for two inches if your pot is bigger. If there’s still moisture at these levels, your plant doesn’t need watering yet.
At the same time, use purified water without fluoride and salt for irrigation.
- Regarding fertilizing, once every two to four weeks in spring and the start of summer will do. Furthermore, use a slow-release formula like Miracle-Gro’s Plant Spikes or Aquatic Arts’ Indoor Plant Fertilizer to avoid problems like brown
- Finally, trimming spider plant is necessary only when there are diseased or dead tissues that need removing. That said, it’s okay to cut the foliage if it’s too big for your home.
In either case, sanitize your scissors with a solution containing one part bleach and nine parts water; then, use them to prune the spider plant.
FAQs
Can I leave the babies on my spider plant?
You can leave the babies or offshoots on the spider plant or cut them off. Either option is fine.
If you choose the latter, I recommend repotting rather than throwing the spiderettes away. These parts will form new plants if you put them in the soil.
With that in mind, here are some tips for repotting spider plant babies:
- Put the babies in a vase with water, but do not submerge the leaves. Alternatively, grow them in a pot with the characteristics we described above.
- If we compare the two methods, the first one has a higher risk of transplant shock. However, it allows you to keep track of the roots and know whether the propagation has been successful.
- Meanwhile, the second method involves a bit of guesswork, since you can’t see what’s happening at the bottom of the pot until new foliage appears.
- Whichever rooting medium you choose, remember to give the spider plant babies indirect
How to make spider plant bushier?
If your spider plant’s looking a bit thin, here are some tricks that can boost its growth:
- Ensure it has proper lighting, soil, water, and fertilization (see our tips above for details).
- Put the pot somewhere that measures 55 to 75℉. For ideal growth, don’t let the temperature drop to 50 degrees or go as high as 80 degrees. Freezing weather of around 30 degrees will kill spider plants.
- Maintain humidity levels of 40 to 80%. The least stressful way to implement this step is probably through a humidifier.
- Prune leaves that are dead or afflicted by pests and disease. Repotting may also help for obvious reasons.
- Put new baby plants into your current pot or split the spider plant into small shoots.
Conclusion
Repotting a spider plant is not that complicated. All you have to do is check the roots of your ornamental, see if they’ve outgrown their pot, and follow the steps above.
Usually, a repotting frequency of once or twice a year will do, with the best periods for transplanting being spring or summer, when spider ivies are not going through their dormancy.
Still, changing containers outside of these seasons is possible, especially if the goal is improving plant health.
Read more:

Hi, I am William – Floridayards’ digital content creator. My job is to find answers to all your concerns with thorough research and our team’s expert advice. I will also bring you honest reviews on the best products and equipment for raising your beautiful garden. Please look forward to our work!