
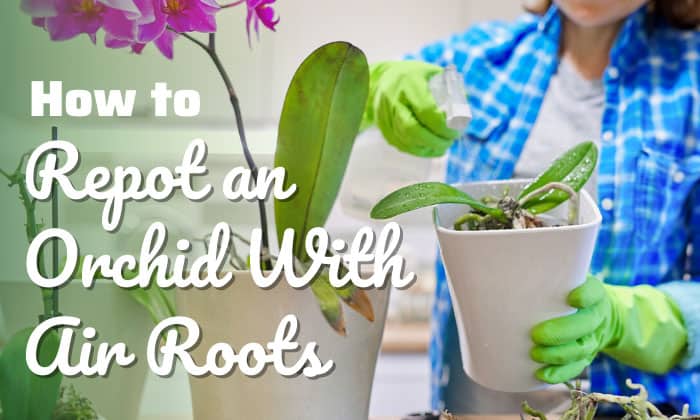
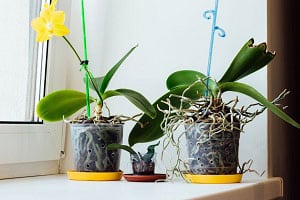
Growing orchids in air are not something to worry about if you have an epiphyte or Phalaenopsis orchid.
However, if there’s a sudden increase of aerial roots on these plants, their current soil may no longer be fertile, and you need to give them a new potting medium.
In this case, read on and learn how to repot an orchid with air roots.
Table of Contents
How to Transplant Orchid Plant With Air Roots
What you need
- A new pot with drain holes
It may sound surprising, but a root bound orchid is typically very healthy, considering this plant enjoys growing in narrow spaces.
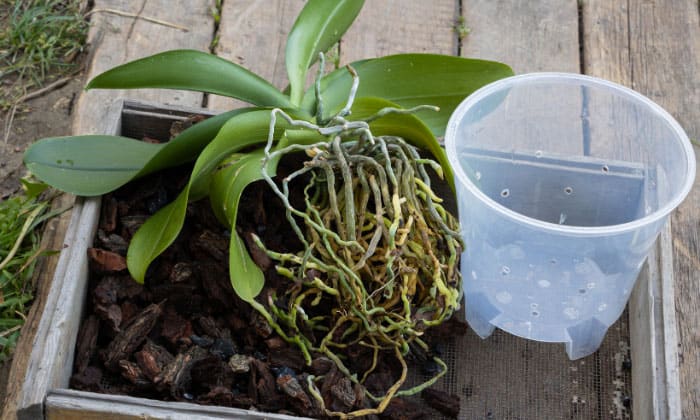
However, you should not reuse small pots for overgrown orchids with tightly tangled roots. If there are many roots and not nearly as much soil, upsize the container.
Pick a pot size that’s one to two inches wider than what you’re using. In terms of materials, clay is preferable to plastic due to its superior drainage.
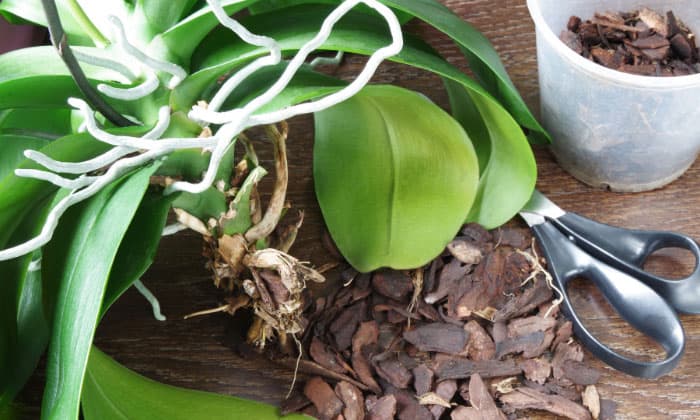
- New potting soil
Do not pot an orchid in regular container soil, which isn’t beneficial for the plant’s roots.
Instead, purchase a commercial potting mix made specifically for orchids. This type of medium is light and well-drained with sufficient air circulation, making it ideal for orchids. If I had to make suggestions, both Better-Gro and Miracle-Gro offer suitable products.
As for DIY mixes, simply combine one part sphagnum moss with bark in a 1:5 ratio or replace sphagnum moss with one part charcoal and an equal amount of sponge rock.
Aside from the soil and container, prepare the following items.
- 3% Hydrogen peroxide to sanitize trimming tools and cut orchid roots
- Scissors
- Water
- Gloves
- Tablecloth or newspaper to keep the repotting area clean
Steps to Repot Orchid With Air Roots
Now that you have all the tools prepared, here are the steps for orchids repotting beginners can follow.
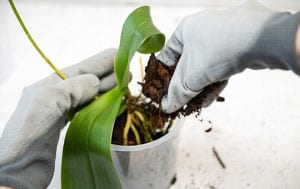
Step 1: Remove the orchid from its container.
Soak the orchid container in water for 15 to 30 minutes to make removing the plant easier.
Hold the container on its side or with the bottom up. Remember to wear gloves and be gentle while getting the plant out.
Step 2: Trim off unhealthy orchid roots.
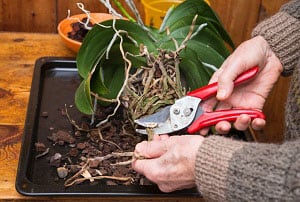
Check the plant for brown, black, mushy roots and dead leaves. Remove them all so that your orchid can start fresh in the new container mix.
Healthy orchid roots will look white or whitish-green, and this applies to both those in the soil and above soil.
As a rule, aerial roots on orchids should turn green after watering. If yours still look white or yellow after being given moisture and feel papery and hollow, that means they’re dead or about to be, and you should remove them.
In that case, sanitize your scissors before and between cuts, and apply hydrogen peroxide to the trimmed sections.
Most importantly, leave aerial roots alone if they’re healthy, no matter your aesthetic preference. Orchids need these parts to thrive, more so if the roots in the soil have rotted and no longer sustain the plant.
Step 3: Wash orchid roots to remove old soil.
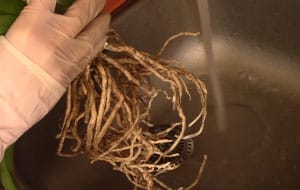
This step is necessary if your old soil is terrible or infected with disease. Soaking orchid roots in warm, 90℉ water will also improve their pliability. Be careful and avoid wetting the crowns, though. If you splash water on them, wipe off the moisture with a cloth.
Let the plant dry before repotting.
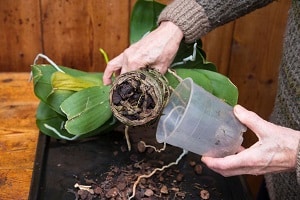
Step 4: Put the plant in a new potting mix.
Cover the bottom third of the container with your plant mix. Place the orchid into it, and pour in more soil to cover the bottom roots but not the foliage.
If you’re unsure what to do with orchid air roots, know that it’s best to keep them above the soil, especially if they’re old. Doing so will prevent the introduction of dead matter into your new pot when these parts inevitably die, and new ones take their place.
Suppose you accidentally put some air roots into the soil, don’t worry too much. The plant will still continue growing after an adjustment period.
Additionally, it’s essential that you can differentiate flower spikes and aerial roots growing from stem. To be clear, orchid vines or roots will have a flat tip, while the head of a flower spike will look like a closed, pointy fist.
Step 5: Give the plant the right conditions to grow.
After repotting orchids, refrain from watering them for a week. At the same time, give the plants twelve hours of indirect sunlight every day and a humidity level of 40% to help them recover.
When it’s time to water, give the soil enough moisture so that liquid drips from the container’s holes. Irrigate every seven to ten days or whenever you see orchid roots white instead of green.
When to Repot an Orchid With Air Roots
Here are the signs it’s time for transplanting orchilds:
- Orchid sprouting new roots, buds, or foliage—Usually, this sign will accompany the other changes on this list.
- Non-aerial roots becoming so long that they are coming out of pot and dislodging the plant.
- Too little soil in the container, or the soil is one to two years old and declining in quality (healthy soil should be loose with a pH of5 to 6.5, to be specific).
Tips for Replanting Orchid Successfully
1. When trimming air roots on orchids, do not apply cinnamon to the cuts.
There are better ways to protect the plant against bacteria and fungi, considering cinnamon can dry orchid roots so much that they die.
To be safe, you can stick with hydrogen peroxide, as we recommended above.
2. Orchid roots should turn green after watering but not stay green all the time.
When your plant looks like this, check if it’s getting enough sunlight and ventilation. Provide filtered light as described above, and open windows or turn on fans at low settings to increase airflow.
3. Although it’s good to have aerial orchid roots growing out of pot, you may want to repot them separately to create new plants. This is especially true if they make your orchid lean to the side or you can’t give the huge plant enough humidity.
In this case, cut the roots off and insert them into separate containers with an orchid mix. If you see growth after a few weeks, your project on propagating orchids from aerial roots has been successful.
4. If you see orchid aerial roots drying out, mist them or install a humidifier.
FAQ
Air roots too long: can I trim them?
Above, we mentioned it’s best to remove only sick aerial roots. You can trim healthy roots if you want, but be aware that they help your plant absorb nutrients.
To minimize problems, cut off the sections you want removed using sterilized scissors after watering the plant, and stay as close to the stem as possible. Make sure there are plenty of healthy roots left to help the orchid recover.
Why is my orchid dying after repotting?
If your orchid deteriorates noticeably after repotting, the most likely culprit is the potting mix. To be specific, such a phenomenon usually indicates that the planting medium drains poorly and has high salt content.
That said, the underlying cause can also lie in your watering habit. Irrigating orchids too much, especially after repotting and while the plant is still going through adjustment shock, can result in root rot as well.
Conclusion
Now that you know how can orchid air roots be planted, plus soil and water conditions for orchids to grow, repotting them should be straightforward.
Just remember the steps above, and wait until spring or summer after flowering occurs to give your plant a new container mix. Should you have any questions on how to repot an orchid with air roots, leave us a message.
Furthermore, learn more about the following articles to know important factors and detailed guides when repotting plants, such as:

Hi, I am William – Floridayards’ digital content creator. My job is to find answers to all your concerns with thorough research and our team’s expert advice. I will also bring you honest reviews on the best products and equipment for raising your beautiful garden. Please look forward to our work!